I love you Contessa!

Can I just say WOW. Ok- I’ve NEVER made chocolate cake before, let alone two layered chocolate cake with a chocolate-coffee frosting. Another thing I’ve ever done? DECORATING. I bought an icing set on a whim while getting some food coloring. A good $5 investment I’m figuring since I’ve been using plastic bags with varying sized holes so far with any of my ganache. I’ll get better now that I know what it feels like actually piping!

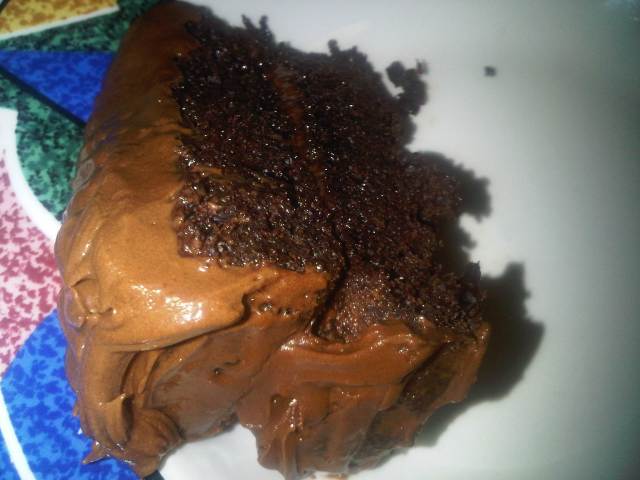
Main point though: This cake recipe is an absolute delight. It’s called Beatty’s Chocolate Cake courtesy of Barefoot Contessa. I’m not a fan of buttercream or chocolate cake, but this thing was dense enough, delicious enough, and the frosting so smooth. I knew it was good when I found Iyka (for whom I’m picking the ultimate cake flavor– it’s his 13th birthday Dec 9th!) hidden behind the fridge door at 11PM cutting another slice.

Ta-da!

Just a quick background: my mixer does NOT work. It’s old, it’s cheap, and it breaks every time I try to use it. So, I mix everything by hand. Whipping the butter until soft and fluffy did not take 3 minutes for me unfortunately. Fortunate part is I burned even more calories! My arms hurt harder than from big boy pushups. Conclusion: If I can do it with no mixer in about an hour and a half, you can definitely do it!

A delicious slice.

Testing this thing out!

Tip: Saving on calories with regular meals by using egg whites for omelettes and saving egg yolks for baking in a small jar. I had 4 originally. I think my mom wrote over it with a '7' since she started following my eating patterns.

I was wondering who was making noise in the kitchen, before I found the awesome Iyka eyeing the cake and getting another piece.

Beatty’s Chocolate Cake

Copyright 2006, Barefoot Contessa at Home, All Rights Reserved
Prep Time: 30 min
Inactive Prep Time: 30 min
Cook Time: 35 min
Level: Intermediate
Serves: 8 servings

Ingredients

  • Butter, for greasing the pans
  • 1 3/4 cups all-purpose flour, plus more for pans
  • 2 cups sugar
  • 3/4 cups good cocoa powder
  • 2 teaspoons baking soda
  • 1 teaspoon baking powder
  • 1 teaspoon kosher salt
  • 1 cup buttermilk, shaken
  • 1/2 cup vegetable oil
  • 2 extra-large eggs, at room temperature
  • 1 teaspoon pure vanilla extract
  • 1 cup freshly brewed hot coffee
  • Chocolate Buttercream, recipe follows

Directions

Preheat the oven to 350 degrees F. Butter two 8-inch x 2-inch round cake pans. Line with parchment paper, then butter and flour the pans.

Sift the flour, sugar, cocoa, baking soda, baking powder, and salt into the bowl of an electric mixer fitted with a paddle attachment and mix on low speed until combined. In another bowl, combine the buttermilk, oil, eggs, and vanilla. With the mixer on low speed, slowly add the wet ingredients to the dry. With mixer still on low, add the coffee and stir just to combine, scraping the bottom of the bowl with a rubber spatula. Pour the batter into the prepared pans and bake for 35 to 40 minutes, until a cake tester comes out clean. Cool in the pans for 30 minutes, then turn them out onto a cooling rack and cool completely.

Place 1 layer, flat side up, on a flat plate or cake pedestal. With a knife or offset spatula, spread the top with frosting. Place the second layer on top, rounded side up, and spread the frosting evenly on the top and sides of the cake.

Chocolate Frosting:

  • 6 ounces good semisweet chocolate (recommended: Callebaut)
  • 1/2 pound (2 sticks) unsalted butter, at room temperature
  • 1 extra-large egg yolk, at room temperature
  • 1 teaspoon pure vanilla extract
  • 1 1/4 cups sifted confectioners’ sugar
  • 1 tablespoon instant coffee powder

Chop the chocolate and place it in a heat-proof bowl set over a pan of simmering water. Stir until just melted and set aside until cooled to room temperature.

In the bowl of an electric mixer fitted with a paddle attachment, beat the butter on medium-high speed until light yellow and fluffy, about 3 minutes. Add the egg yolk and vanilla and continue beating for 3 minutes. Turn the mixer to low, gradually add the confectioners’ sugar, then beat at medium speed, scraping down the bowl as necessary, until smooth and creamy. Dissolve the coffee powder in 2 teaspoons of the hottest tap water. On low speed, add the chocolate and coffee to the butter mixture and mix until blended. Don’t whip! Spread immediately on the cooled cake.


Leftovers Part 2: Sweet Potatoes!

Yet more leftovers. I did say I made way too much food for 3.5 people. I’m not counting my younger brother, Iyka, as a full person. He eats less than a bird.

Needless to say, sweet potatoes are perfectly delicious classically roasted with some nuts, drizzled with olive oil and maple syrup/honey, then tossed with a bit of cayenne pepper. Unfortunately, we’ve been working on other left overs for the past few days, and to top it all off my dad doesn’t like sweet potatoes (that’s unfortunate for him).

I didn’t want to dry them out by placing in the oven to heat them up, and the microwave didn’t seem appealing. I decided to mash them and make them into sweet&spicy crunchy patties with a dollop of honey sour cream.

Honey Crunch Sweet Potatties (I know it's corny- just kidding, it's a crunchy mash! No corn involved!)

Honey Crunch Sweet Potatties

Part 1: Classic roasted sweet potatoes

3 large sweet potatoes (roughly 1lb), cut into 1-in squares

2 tablespoons olive oil

Salt & freshly ground black pepper, to taste

2 tablespoons unsalted butter

2 tablespoons maple syrup

2 tablespoons honey

1/4 teaspoon cayenne pepper

1/4 teaspoon cinnamon

1/2 cup chopped pecans (or walnuts!)

Preheat oven to 375 degrees F.

Lay sweet potatoes in single layer on baking sheet and drizzle with olive oil. Add cinnamon, salt and pepper and toss to coat. Roast in oven until tender and golden, roughly 30 minutes. In last 3 minutes of roasting, sprinkle the chopped nuts on the baking sheet with the potatoes.

Melt butter on medium heat and add in maple syrup, honey, cayenne pepper. Toss the mixture together with potatoes when they’re done.

Enjoy!

Part 2: Leftovers (or just continuation once the potatoes cool completely)

I’m going to use measurements meant for half the amount of the top recipe (assuming you eat half of original recipe).

1/2 of classic roasted sweet potatoes

1 egg

1 tablespoon AP flour

1 cup bread crumbs

2 tablespoons honey

Olive oil for frying

Garnish:

2 tablespoons sour cream

1 tablespoon honey

Cayenne pepper

Step 1: Mash potatoes.

Mash, mash, mash.

Step 2: Add egg and flour and mix well.

Smooth.

Step 3: Mix honey and bread crumbs until crumbly. I used homemade bread crumbs here hence the larger ‘lumps’. Yours will be smoother I’m sure.

Step 4: Coat your skillet with some olive oil and heat up on medium heat. Meanwhile, form the mash into patties and coat with the honey crumb mixture. The patty will be fairly soft and sticky – don’t worry, it will firm up after a few minutes off the heat (and while on the heat in fact).

Patty time. It doesn't look very appetizing here but will taste delicious.

Step 5: Brown on both sides over medium heat. Take off the heat and stack, mix the sour cream with honey and garnish on top; sprinkle with a bit of cayenne pepper.

Frying up.


I also made a few crunchy potato-balls that I simply drizzled with honey. My mom asked for the recipe – here it is, mom!! 🙂

Crunchy honey potato balls.

Colorful & frugal Black Friday deals make me want colorful cookies

ATTENTION GRABBER!

ATTENTION GRABBER!

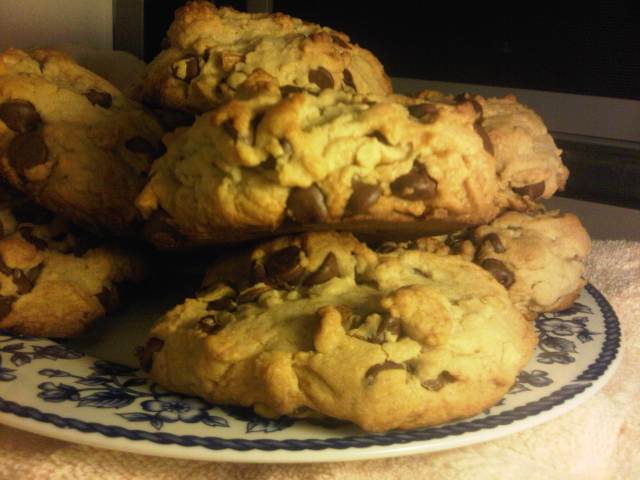
These are the lovelies I’m currently experimenting recipe with. I’m in the process of trying to get perfect QUICK Christmas cookies: colorful, fun, gooey and delicious. Obviously there’s no color in these yet, just bear with me. 🙂 I promise they’re DELICIOUS. Walnuts and dark chocolate – can’t go wrong.

Now that we know what I’m up to in the baking world, my whimsy in the frugal world is Black Friday this weekend, for all the obvious reasons. I don’t usually shop on Black Friday, but I just happened to go to CVS last night to grab some Quaker Oats (deliciously mixed with a bit of honey and chopped walnuts!). This is what I ended up coming back with (grand total: $15.96; savings: $47.06):

CVS Loot

NUTS right?? Well, if you have an Extra Care card head on over to the local CVS because I think the deals last until today (you might want to double-check, never hurts)! What I basically did after wandering around the aisles with my Quaker Oats is pick up the things that were labeled ‘FREE’ after extra bucks rewards. Then I did 4 separate transactions and used the extra bucks coupons to shop for the rest of the stuff. Specifically, this was my breakdown:

Transaction #1:

GM Cinnamon Toast Crunch – 2.87 (sale: saved .72)

FiberOne Brownies – 3.99 (sale: saved .60)

Kleenex Cool Touch – 1.50 (sale: saved 1.07)

Cepacol Sore Throat – 4.99 (sale: saved .50)

TOTAL (w/ NY tax): 13.48

EXTRA BUCKS from Transaction #1 (comes as 2 separate coupons at end of receipt)

FiberOne Brownies: 3.99 EB

Cepacol Sore Throat: 4.99 EB

GM Cinnamon Toast Crunch: 2.00 EB

Kleenex Cool Touch: 1.50 EB

Transaction #2:

Balance bar Cookie dough – 1.69 (sale: saved .50)

Colgate Max Foam toothpaste – 2.87 (sale: saved .62)

Colgate Max White toothpaste – 2.87 (sale: saved .82)

Advil PM 4-ct – .99

Theraflu daytime 1-ct – .99

COUPONS USED FROM PREVIOUS TRANSACTION:

-3.99 (from FiberOne Brownies)

-4.99 (from Cepacol Sore Throat)

Total (w/NY tax): .94

Extra Bucks from Transaction #2

Colgate toothpaste x2: 5.74 EB

Advil PM: .99 EB

Balance bar: 1.69 EB

Theraflu daytime: .99EB

Transaction #3:

Listerine pocket strips 72 ct: 2.99 (sale: saved 1.50)

Listerine pocket strips 72 ct: 2.99 (sale: saved 1.50)

Softlips Cherry lip balm: 2.00 (sale: saved 1.19)

Carmex lip balm: 1.00 (sale: saved .99)

GUM 2-ct toothbrush: 2.99 (sale: saved 1.20)

COUPONS USED FROM PREVIOUS TRANSACTIONS:

-5.74 (from Colgate toothpaste x2)

-2.00 (from Cinnamon Toast Crunch)

-1.50 (from Kleenex Cool Touch)

-.99 (from Advil PM)

-1.69 (from Balance bar)

Total (w/ NY tax): .85

Extra bucks from transaction #3:

Listerine pocket strips x2: 5.98

GUM 2-ct toothbrushes: 2.99

Softlips cherry lip balm: 2.00

Carmex lip balm: 1.00

Transaction #4 (NOTE: This is basically the stuff I WANTED; You can replace these items with ones matching up 12.96 value OR leave it at transaction 3 until next time when you can use the 12.96 EB for something else. Your choice)

Healthy Hoof Nail & Cuticle cream (best thing ever for nails): 4.79

Jello: 1.19

Jello: 1.19

Quaker Quick Oats (finally!!): 3.79

Pepsi: 1.99

Pepsi: FREE (Buy one get one free)

COUPONS USED FROM PREVIOUS TRANSACTIONS:

-5.98 (from Listerine pocket strips x2)

-2.99 (from GUM 2-ct toothbrushes)

-2.00 (from Softlips lip balm)

-1.00 (from Carmex lip balm)

-.99 (from Theraflu)

Total (w/ NY tax): .69

Phew, done! If you’re silly like me and your CVS has a self checkout kiosk, I’d opt for that . It makes me feel less rushed. I had time to organize all coupons between each transaction without someone hovering in back of me rolling their eyes at my frugalness..joke’s on them anyway because you’ll be walking away with 4 bags worth of stuff for $15 (hey, the holidays ARE coming up!)

Creamy Maple Pecan Stuffed French Toast

Despite having plenty of leftovers from Thanksgiving, I decided to whip up French toast for my younger brother. I’m trying out the Dukan diet (more on this to come in future post..very soon I’m sure) so I’m gobbling up the leftover turkey like nobody’s business. Meanwhile I had plenty of rejected stuffing challah that I didn’t want to go to waste.I also had 2 oz (about 1/4 of a package) of cream cheese and a handful of chopped pecans… and about a cup of whipping cream… and …ok I had a slew of ingredients I just didn’t want to go bad. Point is, it came out to this:

Creamy Maple Pecan Stuffed French Toast

This recipe yields one serving (although a pretty hefty serving). I’m including a breakdown of calories per ingredient as a result. You can make substitutions as you feel fit, to cut down on calories (i.e. using skim milk instead of half & half, and sugar-free maple syrup substitute, splenda instead of sugar – you get the idea).

Deliciousness.

Creamy Maple Pecan Stuffed French Toast

Bread:

Two medium-thick slices of Challah bread

1 egg

3 tablespoons half-and-half

1/4 teaspoon EACH: vanilla extract, cinnamon, nutmeg, maple syrup

1 tablespoon butter

Filling:

1/4 pack cream cheese softened (about 2 oz, can use a little more or less depending on how much filling you’d like)

2 tablespoons maple syrup

1/4 teaspoon cinnamon

1 teaspoon powdered sugar

Topping:

1 tablespoon powdered sugar

3 tablespoons maple syrup

3 tablespoons chopped pecans

Bread: Beat the egg, half & half, vanilla extract, cinnamon, nutmeg, and maple syrup together until everything is well incorporated. Soak the two slices of challah bread thoroughly in the mixture on both sides and leave in bowl for about 30 minutes to let the mixture soak through.

Meanwhile make the filling.

Filling: Mix softened cream cheese and maple syrup together. Beat together until well incorporated and creamy. Mix in cinnamon and powdered sugar and set aside.

Place skillet on medium heat and melt 1 tablespoon of butter. Fry the pieces of french toast until browned on each side. Transfer the two pieces n a clean plate and spread the cream cheese mixture on each piece. Put the pieces together. Start making the topping.

Topping: Turn the stovetop heat on low and place the chopped pecans into any leftover butter in skillet. Mix the nuts in skillet for about 5 second and add the maple syrup. Turn off heat (the mixture should be warm since skillet is still hot from french toast). Sift the powdered sugar over the french toast and then top with the warm maple-pecan mixture.

If you’d like to make the whipped cream:

1 cup whipping cream

1/4 teaspoon cinnamon

3 tablespoons confectioners sugar

1 tablespoon maple syrup (I’m really into using maple syrup this fall!)

1 teaspoon vanilla extract

Beat all ingredients together with mixer until mixture is light and fluffy. Serve on top/side of french toast!

Enjoy!

Continue reading

I’m thankful it’s over!!

Thanksgiving! Yes – wonderful food galore, but man did it wreak havoc on my body. The good thing about Thanksgiving is that I spent all day cooking (that’s a lot of calories burned). I got up at 9am and hit the kitchen prepping everything (by hand – chopping, mixing, peeling, washing). Dinner was finally served at 6pm. That’s a full day at work! Let me put it this way: it’s about 1,200 calories burned! I felt I didn’t have to skimp on the stuffing or the dessert as a result. Speaking of dessert, there were 3 pies: chocolate pecan, pumpkin, and for my mother’s birthday a caramel apple pie cheesecake (it tasted as good as it sounds – Paula Deen is amazing). Some photos? Mais oui:

Caramel apple pie cheesecake and chocolate pecan pies! Will post recipes soon.

Delicious creamy pumpkin pie out of the oven!

Brussel sprouts - mandolined thin and softened by stir frying with chopped pecans and a bit of butter. Then tossed with chopped dry cranberries. Yum.

Turkey browned by the brine and then washed/scalded and pat dry. The aromatics consisted of one thinly sliced apple, half a sliced onion, water, cinnamon, 3 sprigs rosemary, and 5 sage leaves mixed together, microwaved and poured into turkey cavity. Delicious smell. (Recipe by Alton Brown; amazing moist turkey!)

Everything on the table - I couldn't find the rope to tie turkey legs together so my turkey was a bit indecent toward the cranberries and the brussel sprouts.

It looked more amazing. There was no room for decoration on the table unfortunately. I could hardly fit all the food.

Sweet potatoes drizzled with olive oil and honey, pecan pie, and green beans tossed with bread crumbs & butter..

I STILL felt full the next day (wonderful Black Friday). My cat joined me in lazying around on the couch:

Shango nap.

‘Horishki’/’Nuts’ cookies

I’ve made a few sweets since my last post and was fiddling around with my phone camera to get some pictures and transfer them over to the laptop. Finally got everything in working order.

Following is recipe my grandmother used to make when I was younger. I LOVED these (they’re called “horishki” which translates to nuts in English). The name comes from the fact that they’re made in little forms that make the cookies look like walnut shells. These forms were widely produced and sold in USSR, but I’m sure they’re around on eBay now if you’d like to use these. Otherwise you can essentially make the cookies from any forms that will allow you to put 2 pieces together. Please note that the cookies should be lined fairly thin in any form (about an inch and a quarter thick).

Horishki

Size of one cookie

Horishki forms

Dough:

– 1 cup sifted powdered sugar

– 3 cups flour

– 200grams sweet(unsalted) butter [that’s about 2 ‘sticks’] at room temperature (soft)

– 3 tablespoons sour cream

– 2 egg yolks

-.25 teaspoon baking powder

Mix everything except baking powder until just mixed (it’ll be a bit crumbly) then add baking powder and continue mixing. Continue kneading dough in bowl until it starts ‘sticking’. For these I took little balls and pressed them into the ‘nut’ forms but you can essentially press the dough into any form that will give them a hollow shape (they need to hold filling inside) or you can try hand forming little ‘thumbprint’ cookies. The dough stays together if kept to a smaller shape. Since it rises a little and it’s pressed down fairly thin, it can burn quickly in oven, so bake them on lower temperature, 275 degrees F, for about 15 minutes. Check on them often and take the cookies out when the edges are lightly browned.

For filling:

– 150G of finely chopped walnuts (the finer the better; can further crush them with mallet into ‘powder’). 150G is about .75 cups, but you can make it to taste depending on how many nuts you want in.

– 1 14 oz can of condensed milk

-2 tbsp butter

Remove the paper wrapping from milk can and place the unopened can into a pot of water completely submerged. Bring it to a slow rolling boil and let it boil on the stove for about 2.5 hours. Once done, open the can (it will be thick and caramel color) and mix it with nuts. Add in 2 tablespoons of butter and mix everything very well. Refrigerate to thicken the mixture before spreading on cookies.

*This makes a LOT of filling, so depending on how much you want to use in the cookies you may have some left over, in which case you can use in another batch or in another pastry.

Spread the filling on the cooled cookie pieces and sandwich together. You may ‘cover’ the cookies by sifting cocoa powder with confectioners sugar, then rolling the ‘nuts’ in the powder. Refrigerate for an hour to have the filling firm up before serving. Enjoy!!

Forms filled and ready to bake

Filling cookie

Here we go

A few people suggested that I start blogging about my baking.

Baking, in my brief life history, spans back to my childhood. I had the privilege of being raised by my grandmother. We all know mothers bake cookies once in a while and like spoiling us with home cooked meals. Well, grandmothers are naturally mother x 2. We didn’t just bake – we BAKED. Religiously baked everything.

I grew up in a small town in Ukraine so self sustainability was natural course of action (all fruits and veggies came from the garden, get the milk from the neighbor, make your own cheese, visit the chicken coup in the morning and stock up on eggs, etc.). I really didn’t understand the beauty of this well oiled machine until now, living in New York City, where every 5th person you pass on the street obsesses over ‘natural’ and ‘organic’ and ‘healthy’. Interestingly enough, I’m not buying into that trend. I guess it’s not so interesting. To be organic in the city is EXPENSIVE and time-consuming. I grew up organic because it was cheap and easy.

Now that we have the background, on to the skinny part. We all heard of the ‘French Women Don’t get Fat’ book. Here’s a secret: most non-American culture women don’t get fat. I learned about fresh air and chores and moderation. I remember my grandmother and I often cooked up a feast that spanned several days of cooking and baking. Yet everyone around was fairly fit and healthy. We worked in the garden, in the orchard, tended to animals, and toiled in the kitchen, hand-washing all utensils and working surfaces. Tending to animals, gardening and up-keeping the orchard is naturally impossible in the city. What is possible is simple and organic way of cooking (granted, with non-‘organic’ products sometimes since I’m short on money!), baking and living.

That last tidbit of information is to warn you that you won’t often find me scrimping on procedures to save time. I don’t like using mixes for baking or cooking and I will make everything from scratch when I can. It’s worth it thought. The most important thing I learned is when I revel in my cooking and spend time on it, I eat less afterwards as a result. I satiated all my senses in the procedure. I fully understand Trader Joe’s frozen meals are cheap, easy, and natural but when you heat it up in 10 minutes and scarf it down in the next 10, you’ll have another 4-5 hours to sit around and nibble on hundreds of additional calories. When you immerse yourself in a 1 hour cooking experience, you’ll WANT to enjoy it slowly. So, put down that can of spam and ENJOY the cooking – or, baking in my case.

LESSON: Pay attention to your cooking. You’ll learn that your meal consists of several ingredients, and as a result you’ll be satiated with the portion of your meal more than from a pre-made meal. As a bonus,  you can input the measurements for each ingredient into a calorie counter to get the total accurate calories per meal.